The NTP (Network Time Protocol) is an Internet protocol that is used to synchronize the time on your system with a centralized Network Time Protocol server. It also analyses the timestamp values including the frequency of errors and the stability. On the other hand, Chrony is a flexible implementation of the Network Time Protocol (NTP).
This guide will help you to install and configure Chrony on Ubuntu 20.
List the available time zones and then choose your preference.
# timedatectl list-timezones

The below command help to set the server time zone. For example, change Asia/Hong_Kong to your time zone.
# timedatectl set-timezone Asia/Hong_Kong

Update the package information index by executing the below command.
# apt update

Start to install chrony with the below command.
# apt install chrony -y

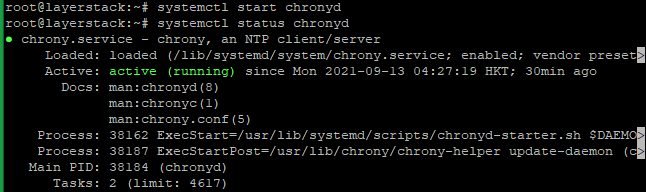
Start the Chrony service and check the status of the service.
# systemctl start chronyd

# systemctl status chronyd
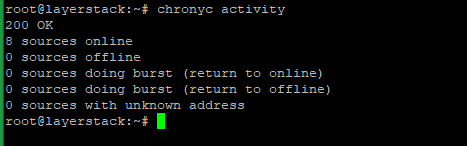
Execute the below command to check the number of connected servers and peers.
# chronyc activity
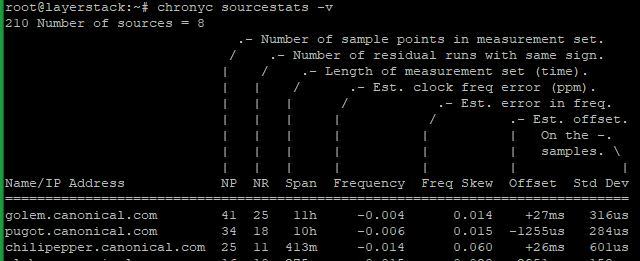
Show the statistics for each server.
# chronyc sourcestats -v
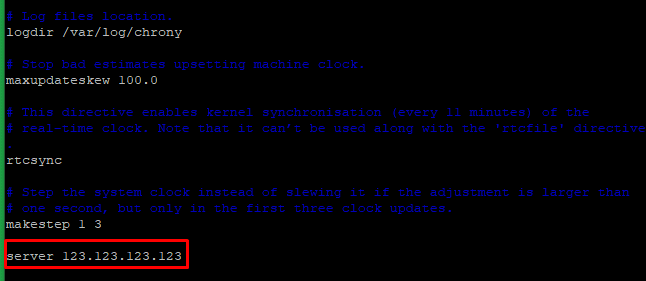
Use the following command vi /etc/chrony/chrony.conf to edit the configuration file and add the below code to the end of the file and then Save & Exit.
# server 123.123.123.123
NOTE: Replace the IP address with your server IP address
Synchronize the servers and restart the Chrony service.
# timedatectl set-ntp true

# systemctl restart chronyd

Run the below command to check the list of clients added.
# chronyc clients

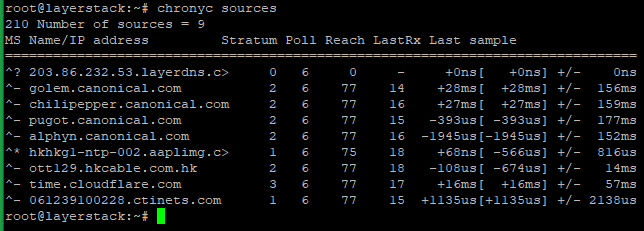
Check the Chrony sources now.
# chronyc sources
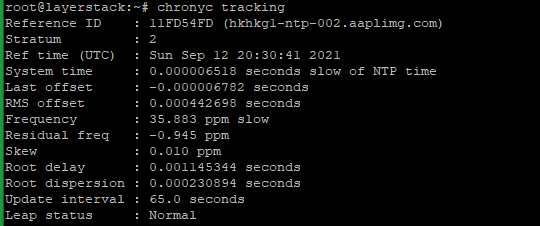
Execute the below command to check whether the server chrony is tracking with its performance metrics.
# chronyc tracking