OpenSSH stands for open-source SSH protocol implementation. It is free and open-source as it can be customized. The connection established via OpenSSH will be encrypted which provides security aspects, eliminating hijacking, sniffing, eavesdropping and other network attacks.
The tutorial describes simple steps to install OpenSSH on Windows Server 2022. The following steps are to be performed prior to the installation steps.
Installation of OpenSSH
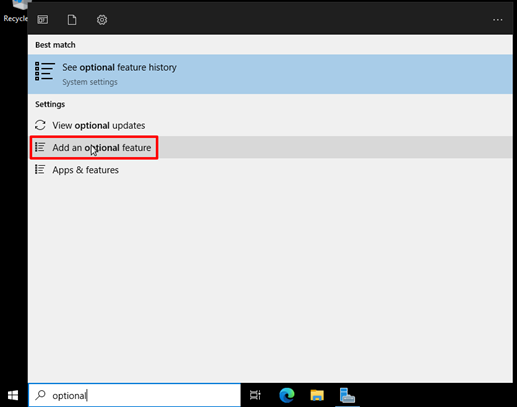
Go to start menu and type Optional Features in the search option.
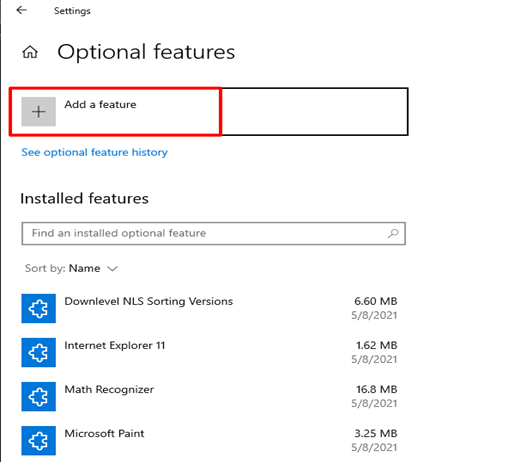
Click on Add a feature and enter the OpenSSH in the search box, select the same.
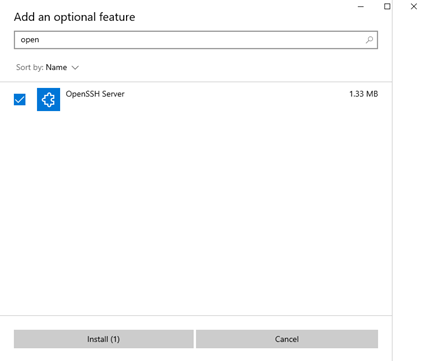
Select the OpenSSH Server and proceed to click Install.
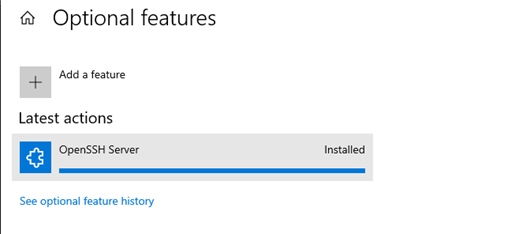
The progress bar shows Installed and can conclude the OpenSSH server has been installed in the server, as it will be available in Installed Features.
To install OpenSSH using Windows PowerShell
Open the Windows PowerShell as Administrator.
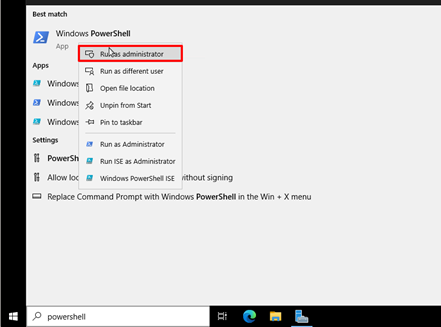
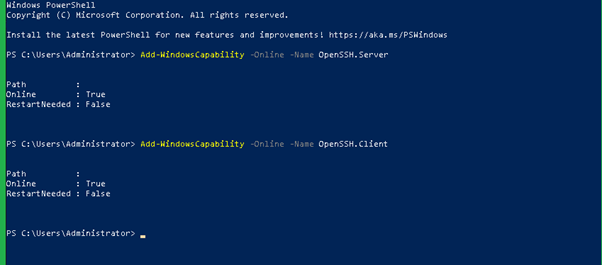
Run the following commands to install OpenSSH Server as well as OpenSSH client.
Add-WindowsCapability -Online -Name OpenSSH.Server
Add-WindowsCapability -Online -Name OpenSSH.Client
Firewall configuration for OpenSSH after installation
To customize the Installation configuration, you would require to edit the configuration file in the file C:\Programdata\ssh\sshd_config.
The following steps are to be done in order to configure the SSH port to be allowed into the Windows firewall.
Select Windows Defender Firewall with Advanced security from Server Manager.
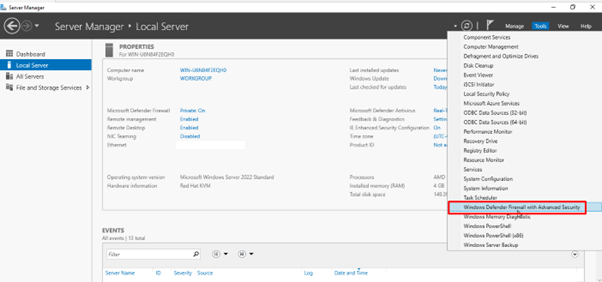
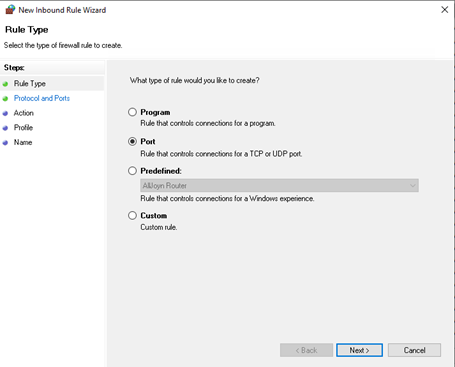
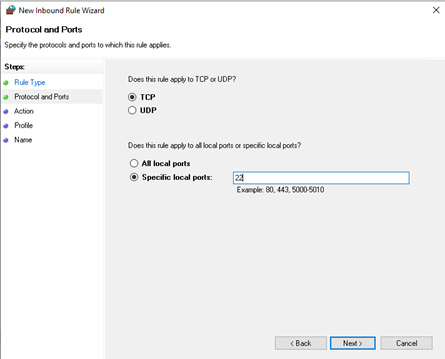
To allow incoming connections, Click Inbound Rules in the Firewall window and select a new rule, select Port and click Next.
Select the protocol which is TCP and the specific local ports section, and enter 22 as the OpenSSH port number is 22.
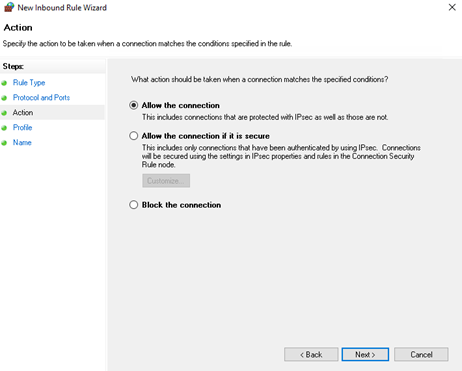
Select Allow the connection option to proceed further, and click on Next.
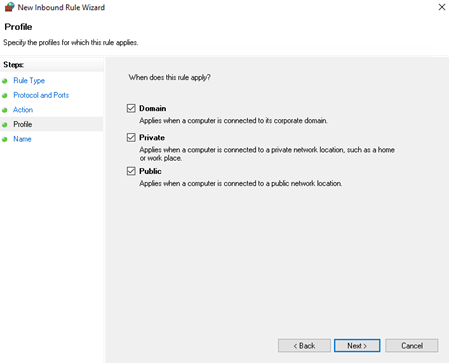
Here we specify when this rule applies. Select them and proceed further.
Finally the rule name and description specified, click Finish.
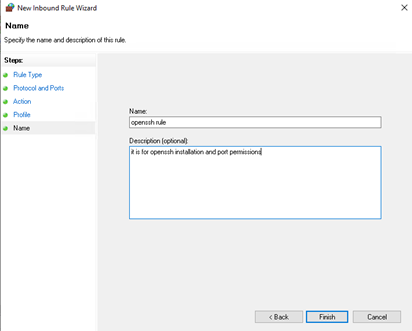
The above will add the firewall rule for incoming SSH connections and now you may test it.
Once done, you would require to start the SSH.
Start-service sshd

Now, you may attempt to take SSH access to the Windows server using the command format:
ssh -l Administrator < server-ip >
NOTE: Replace SERVER IP with your real IP
It will prompt for a password, once entering you would be able to get the output as below:

Related Tutorials