How to install an SSL certificate on Plesk Panel
When it comes to security these days, an SSL certificate is necessary. Before proceeding with the SSL installation on the Plesk server, you must purchase a certificate from any Certificate Authority. In order to purchase a certificate, need to give a Certificate Signing Request (CSR) to the Certificate Authority. It contains the information about organization's name, domain name, and location. This information is used to verify and create the SSL certificate.
Once the SSL certificate files are received from the Certificate Authority as the zip file, unzip the files and copy them locally where need to keep.
This article will guide you on how to generate the CSR required for purchasing the SSL certificate from the Plesk panel as well as installing the SSL certificate on your Plesk server.
Create "Certificate Signing request (CSR)" from Plesk Panel
In order to purchase a certificate, need to give a Certificate Signing Request (CSR) to the Certificate Authority. It contains the information about organization's name, domain name, and location. This information is used to verify and create the SSL certificate.
Log in to the Plesk account using the below link and select
Websites & Domainsoption from the left-hand menu.https://IPAddress:8443/
Choose the domain in which you need to create the CSR and click on the
SSL/TLS Certificatesoption.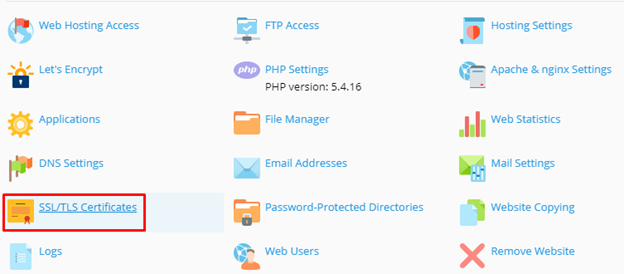
Click on
Add SSL/TLS Certificatebutton.
Enter the requested details in the form to generate a request for a certificate and then click on the
Requestbutton.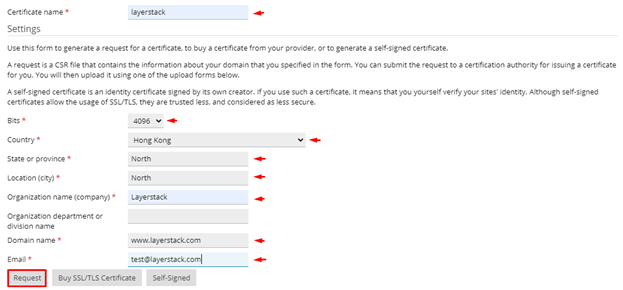
Once the CSR is created, you will see a notification and you can see the
CSR Part suppliedmessage if you hover your mouse cursor on theCSR iconand also you can download it from the down arrow button on the right side. All are mentioned in the below image.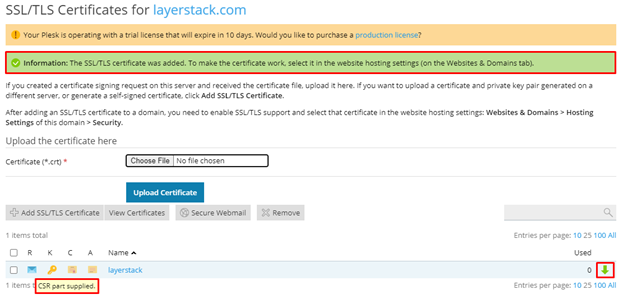
Now you can use this CSR (Certificate Signing request) to purchase a certificate
Start to install "SSL certificate" on Plesk Panel
Once the SSL certificate has been purchased, the below steps can be used to install the certificate through the Plesk panel.
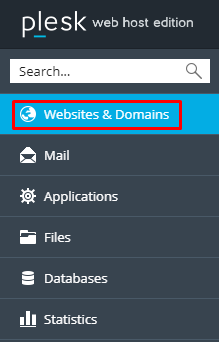
Log in to the Plesk account using the below link and select
Websites & Domainsoption from the left-hand menu.https://IPAddress:8443/
Choose the domain in which you need to install
SSL Certificateand click on theSSL/TLS Certificatesoption.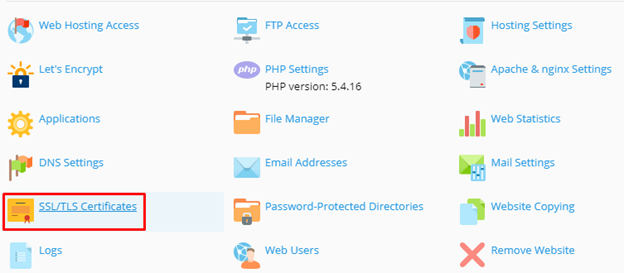
The SSL certificate can now be installed in three different methods, based on the form of availability of the certificate components (certificate and private key).
Option A
If your SSL certificate is stored in a single
.crtfile, then browse the certificate and click onUpload Certificate.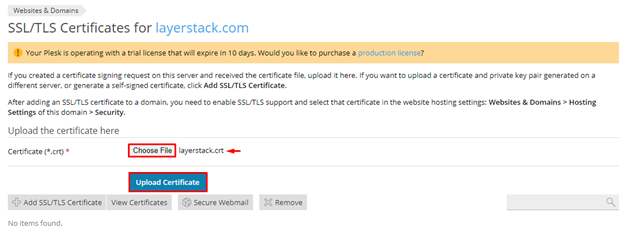
Option B
If your SSL certificate is stored in both
.key(Private Key file) and.crt(Certificate file) files, then browse the files and click onAdd SSL/TLS Certificatebutton.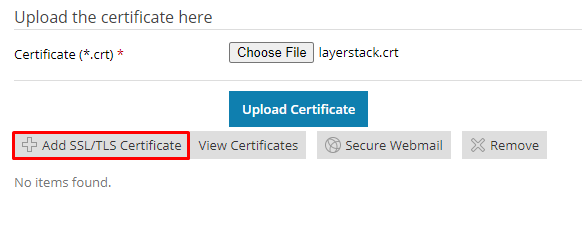
Now upload the certificate files under the
Upload the certificate filessection and clickUpload Certificateonce uploaded.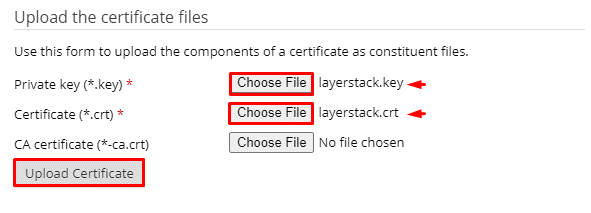
Option C
If your SSL certificate is stored as a text, then browse the files and click on
Add SSL/TLS Certificatebutton, and paste the certificate and the private key parts into the corresponding fields under theUpload the certificate as textsection.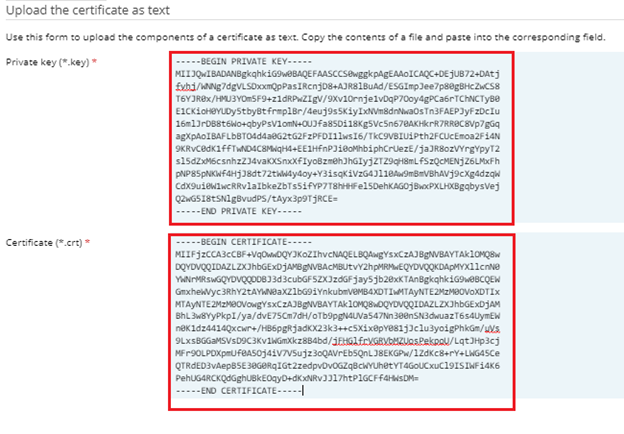
Continue the remaining steps for installing the SSL certificate
Once you have added the certificate with any of the options mentioned above, you will see a notification like the one in the image below.

Once the certificate is added, select
Websites & Domainsoption from the left-hand menu and go under the website in which you added the SSL certificates.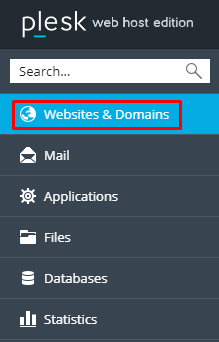
Now click on the
Hosting Settingsoption to enable SSL support.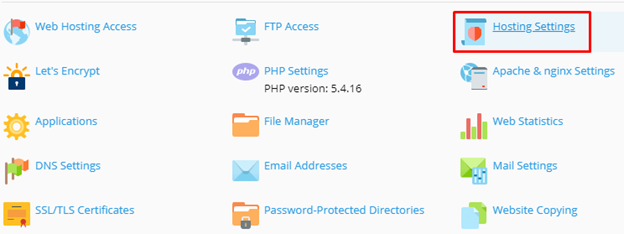
Now tick on the box near the
SSL/TLS supportoption to enable SSL support and select your added SSL certificate from the certificate drop-down, then clickOKbutton.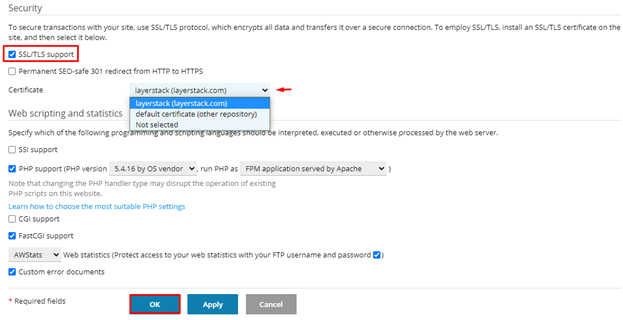
Related LayerStack Products
Related Tutorials
Installing Plesk control panel on Linux & Windows Cloud Servers
Getting a free SSL certificate with Let's Encrypt with Apache on CentOS 7
SSL Certificates with IIS web server on Windows Cloud Servers
SSL Certificates with Apache web server on Linux Cloud Servers
How to perform a Full Backup and Domain Backup in Plesk Panel
