How to set up Firewall Policies using Iptables
Iptables, an embedded command-line tool, operates packet filtering within the Linux Kernel Netfilter firewall system. It manages both inbound and outbound network traffic by aligning network packets with predefined chain regulations on the server. Employing a hierarchical rule execution structure encompassing tables, chains, and rules, Iptables effectively filters network traffic on the server.
Firewalls play a crucial role in network security by filtering incoming and outgoing traffic. Iptables is a versatile tool in Linux for configuring firewall policies. This guide provides a step-by-step approach with commands and examples to help you set up and manage Iptables effectively.
Prerequisites
Deploy a Linux server and establish access to it via SSH or Console.
1. Understanding iptables Basics:
Iptables applies filtering to network packets according to the specified table and chain rules. The primary tables utilized by iptables are outlined below:
- Filter Table: Filters packets based on rules to allow or deny packets.
- NAT Table: Translates source addresses for forwarding.
- Raw Table: Accesses packets before kernel state tracking.
- Security Table: Sets SELinux security context on packets.
- Mangle Table: Alters packet headers and information.
Iptables utilizes predefined chains to filter network traffic and establish firewall policies:
- INPUT: Handles incoming network packets.
- OUTPUT: Handles outgoing network packets.
- FORWARD: Manages forwarded packets within the server.
2. Viewing Available Rules
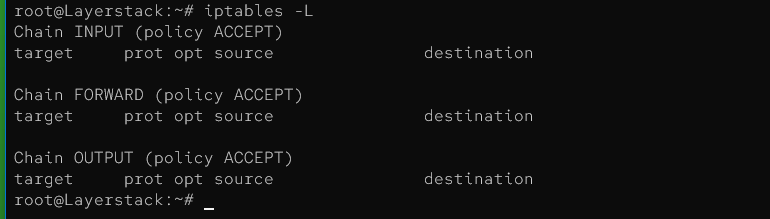
Use the command below to list all currently active rules in the default table, providing a full view of the firewall configuration, including the rules set for input, output, and forward traffic:
# iptables -L
Example Output:
3. Allowing Incoming Network Requests
Permitting connection requests to the loopback interface:
# iptables -A INPUT -i lo -j ACCEPT
The provided rule facilitates incoming connection requests to the localhost loopback interface. In this command:
-Aadds the rule to the INPUT chain of the filter table.-i lorestricts the rule to the loopback (lo) interface.-j ACCEPTallows matching network packets to proceed without additional processing.
Permitting established and bidirectional/two-way network connections:
# iptables -A OUTPUT -m conntrack --ctstate ESTABLISHED -j ACCEPT
This iptables command appends a rule to the OUTPUT chain, permitting packets of established connections to pass through by accepting them based on their connection tracking state.
Allowing incoming connections to specific ports:
# iptables -A INPUT -p tcp -s 123.1.2.3/24 --dport 22 -m conntrack --ctstate NEW,ESTABLISHED -j ACCEPT
This iptables command appends a rule to the INPUT chain, allowing incoming TCP packets from the specified source IP range (123.1.2.3/24) and destination port 22 (SSH), for both new and established connections, permitting SSH traffic from that specific IP range.
Allowing connections between network interfaces:
# iptables -A FORWARD -i enp1s0 -o enp8s0 -j ACCEPT
This iptables command appends a rule to the FORWARD chain, permitting all traffic coming in from interface enp1s0 and going out through interface enp8s0, allowing communication between these two network interfaces.
4. Allowing Outgoing Network Requests
Allow All Outgoing Network Traffic:
# iptables -A OUTPUT -j ACCEPT
This iptables command appends a rule to the OUTPUT chain, allowing all outbound traffic to pass through by accepting all packets without any specific conditions or filtering.
Allow Outgoing Network Traffic from Loopback Interface:
# iptables -A OUTPUT -o lo -j ACCEPT
This command allows outgoing network traffic from the loopback interface 127.0.0.1, which is crucial for local inter-process communication.
Allow Established Outgoing Connections:
# iptables -A OUTPUT -m conntrack --ctstate ESTABLISHED -j ACCEPT
5. Blocking IP Addresses and Network Requests:
Blocking specific IP addresses:
# iptables -A INPUT -s 123.1.2.10 -j DROP
This iptables command appends a rule to the INPUT chain, blocking all incoming traffic from the specific source IP address (123.1.2.10), effectively dropping any packets originating from that address.
Blocking network connections to specific interfaces:
# iptables -A INPUT -i enp8s0 -s 123.1.2.20 -j DROP
This iptables command appends a rule to the INPUT chain, dropping all incoming traffic from the specific source IP address (123.1.2.20) that arrives through interface enp8s0, effectively blocking packets originating from that source on that specific interface.
Blocking IP access to specific ports:
# iptables -A INPUT -p tcp -m multiport --dports 22,5901 -s 123.11.10.0/24 -j DROP
This iptables command appends a rule to the INPUT chain, dropping all TCP traffic destined for ports 22 (SSH) and 5901 (VNC) from the specified source IP range (123.11.10.0/24), effectively blocking SSH and VNC connections originating from that specific IP range.
Blocking all incoming network requests:
# iptables -A INPUT -j DROP
This iptables command appends a rule to the INPUT chain, dropping all incoming traffic without any further conditions or filtering, effectively blocking all incoming connections.
6. Deleting iptables Rules:
Based on your server's network requests, you have the flexibility to either remove particular iptables rules or adjust existing entries to suit your requirements. For instance, if there's a need to restrict access from a specific IP address, you can either delete the corresponding IP block rule or tailor the existing rules accordingly.
# iptables -D INPUT -s 123.0.1.20 -j DROP
This iptables command deletes a specific rule from the INPUT chain, which was previously added to drop all traffic originating from the IP address 123.0.1.20.
7. Logging iptables Rules:
Logging dropped packets:
# iptables -A INPUT -j LOG --log-prefix "Dropped iptables packets:"
This command appends a rule to the INPUT chain to log all dropped network packets. The --log-prefix option allows you to specify a prefix for the log messages to easily identify them.
Logging unknown network packets:
# iptables -A INPUT -j LOG --log-prefix "Unknown network packets:"
This command appends a rule to the INPUT chain to log all unknown network packets. Similar to the previous command, the --log-prefix option is used to specify a prefix for the log messages.
Verify Log Entries:
You can view the system log file /var/log/syslog to verify the iptables log entries that match your rules. Use the following command:
# cat /var/log/syslog
This command will display the contents of the syslog file, where you can find entries related to the iptables rules you've set up. Look for log messages with the prefixes "Dropped iptables packets:" and "Unknown network packets:" to identify the logged events.
8. Permanently Saving iptables Rules:
Install iptables-persistent package:
# apt install iptables-persistent
This command installs the package "iptables-persistent" using the apt package manager, which allows for persisting iptables rules across system reboots on Debian-based Linux distributions.
Save iptables rules:
# netfilter-persistent save
This command saves the current iptables rules to the disk, effectively persisting them across reboots using the netfilter-persistent utility.
Conclusion:
We have now configured firewall policies using iptables on Linux server. These rules provide effective protection against unauthorized access and ensure secure network communication. For more detailed information and additional commands, refer to the man iptables manual page.
Related Tutorials
