How to set up, configure & secure vsFTPd on Linux Cloud Servers
The vsftpd, is one of the popular FTP servers for Unix-like systems, including Linux. The full form of the vsftpd is Very Secure FTP Daemon. The vsftpd is the default FTP server in the various Linux distributions. The main advantages are secure and extremely fast, and it is stable.
See the instructions for installing and configuring vsftpd on CentOS, Debian and Ubuntu below.
Start to install vsftpd
Before proceeding with the installation of vsftpd, execute the below command to update all the system packages.
# sudo apt-get update
or
# yum update
Install vsftpd now.
# sudo apt install vsftpd
or
# yum install vsftpd
Once the installation is complete, take a backup of the vsftpd configuration file using the following command.
# sudo cp /etc/vsftpd.conf /etc/vsftpd.conf.backup
Start the vsftd service and enable it to launch during the system boot time.
# sudo systemctl start vsftpd

# sudo systemctl enable vsftpd
Configure the Firewall
Check the firewall status to see whether it is enabled or not.
# sudo ufw status (Ubuntu / Debian)
or
# systemctl status firewalld (CentOS)

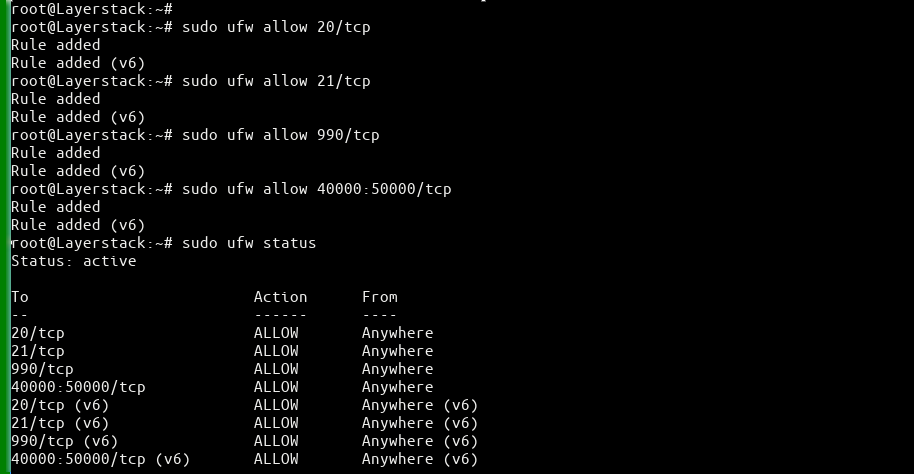
If it is enabled, add the following firewall rule to allow the connection to the
FTP port 21.(Ubuntu / Debian) # sudo ufw allow 20/tcp # sudo ufw allow 21/tcp # sudo ufw allow 990/tcp # sudo ufw allow 40000:50000/tcp # sudo ufw statusor
(CentOS)
# firewall-cmd --zone=public --permanent --add-service=ftp
# firewall-cmd --zone=public --permanent –add-port=21/tcp
# firewall-cmd --permanent --add-port=40000-50000/tcp
# firewall-cmd –reload


Set up FTP user and User Directory
Create a new FTP user.
# sudo adduser lstest
Set the password for the FTP user.
# sudo passwd lstest
Create the FTP folder.
# sudo mkdir /home/lstest/ftpSet pemission for FTP folder:
# sudo chown nobody:nogroup /home/lstest/ftp

# sudo chmod a-w /home/lstest/ftp

# sudo ls -la /home/lstest/ftp
Create a test file “test.txt” in the FTP folder for testing.

Configuring and Securing VsFTP Server
Open the vsftpd config file (vsftpd.conf) and Add/modify the following options with these values:
# sudo vi /etc/vsftpd.conf
or
# sudo nano /etc/vsftpd.conf

anonymous_enable=NO  # disable  anonymous login
local_enable=YES  # permit local logins
write_enable=YES  # enable FTP commands which change the filesystem
local_umask=022  # value of umask for file creation for local users
dirmessage_enable=YES  # enable showing of messages when users first enter a new directory
xferlog_enable=YES  # a log file will be maintained detailing uploads and downloads
connect_from_port_20=YES  # use port 20 (ftp-data) on the server machine for PORT style   connections
xferlog_std_format=YES  # keep standard log file format
listen=NO  # prevent vsftpd from running in standalone mode
listen_ipv6=YES  # vsftpd will listen on an IPv6 socket instead of an IPv4 one
pam_service_name=vsftpd  # name of the PAM service vsftpd will use
userlist_enable=YES  # enable vsftpd to load a list of usernames
tcp_wrappers=YES  # turn on tcp wrappers
chroot_local_user=YES  #prevent the FTP-connected user from accessing any files or     commands outside the directory tree
chroot_local_user=YES  #restrict FTP users to their Home directories.
allow_writeable_chroot=YES  #restrict FTP users to their Home directories.
Set up passive port range and add the following values in its vsftpd configuration file.
# sudo vi /etc/vsftpd.conf
or
# sudo nano /etc/vsftpd.conf

pasv_min_port=40000
pasv_max_port=50000
Once this is done, configure FTP access to users based on the user list file (/etc/vsftpd.userlist).
# sudo vi /etc/vsftpd.conf
or
# sudo nano /etc/vsftpd.conf

userlist_enable=YES
userlist_file=/etc/vsftpd.userlist
userlist_deny=NO
Add our user to /etc/vsftpd.userlist.
# echo "lstest" | sudo tee -a /etc/vsftpd.userlist
Restart the vsftpd services to load the configuration changes.
# sudo systemctl restart vsftpd
or
# service vsftpd restart
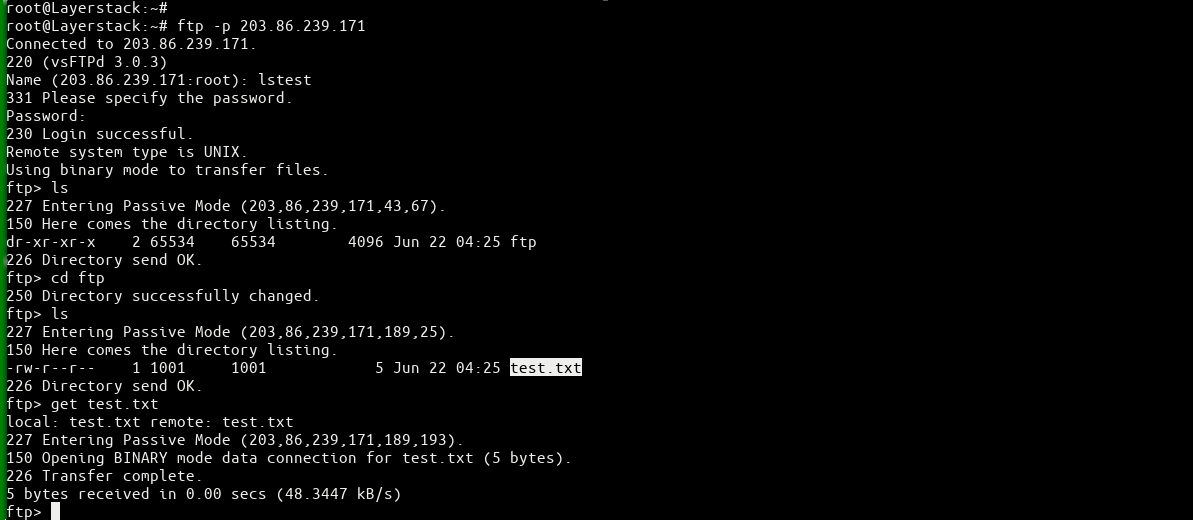
Testing FTP Access finally.

