When you experience a slow internet access speed on your server, the first thing you need to do is check the network connection speed to troubleshoot the slow connectivity issues. The Speedtest CLI tool helps in checking the current internet speed of your Windows server from the command prompt.
In order for the Speedtest CLI tool to work from the Windows command prompt, an environment variable needs to be set for the speedtest tool, else, the tool can only be operated from the folder which contains the speedtest executable file.
This tutorial will guide you on how to test internet connection speed on Windows servers using the Speedtest CLI tool.
Downloading the Speedtest CLI tool
The first step in installing the Speedtest CLI tool in Windows servers is to download the tool from the official website. The tool can be downloaded inside the server from the below link:
https://www.speedtest.net/apps/cli
Scroll down the page and click on Download for Windows button.
A zip archive, named ookla-speedtest-x.x.x-win64 will be downloaded. Extract the archive using the default Windows extraction tool or any other such applications such as WinRAR.
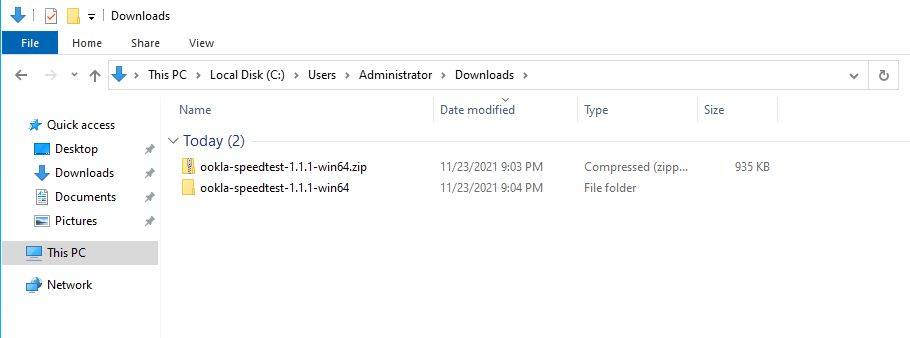
The extracted folder will contain two files, namely, speedtest.md and speedtest.exe.
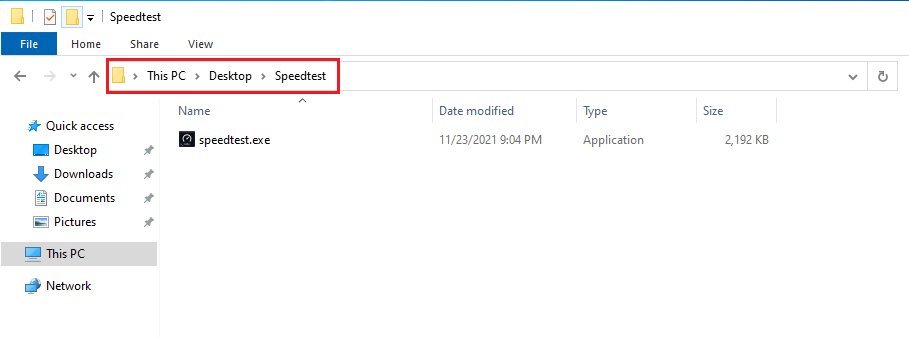
For ease of use, it is preferable that the speedtest.exe be copied over to any other folder in the server with a name related to speedtest.
In the below example, the folder named Speedtest has been created in the Desktop of the server and the speedtest.exe file is copied to it.
Setting up the environment variable for Speedtest
The next step in the installation of Speedtest CLI is to set up the environment variable for Speedtest so that it can be used from any folder in the Windows command prompt.
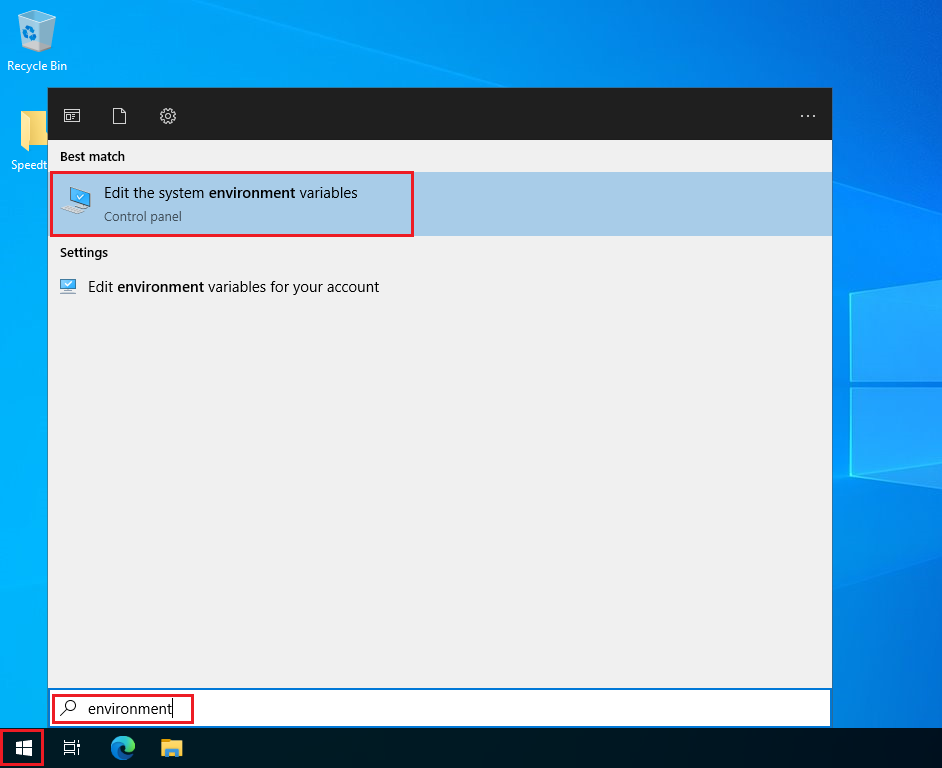
Click on Start, search for environment and then click on Edit the system environment variables.
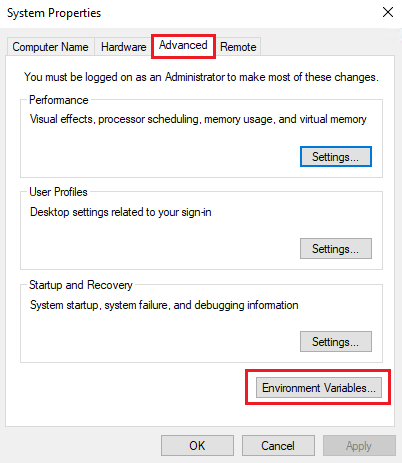
From the System Properties window that opens up, click on Environment Variables… button in the Advanced tab.
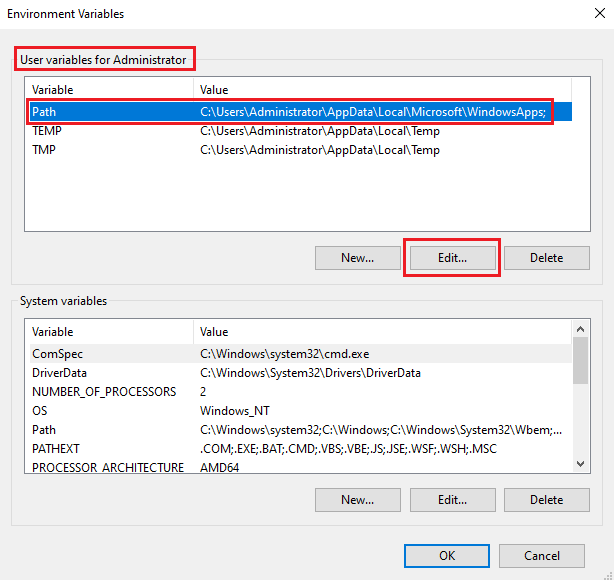
From under the User variables for Administrator section, click on the variable named Path and then click on Edit… button.
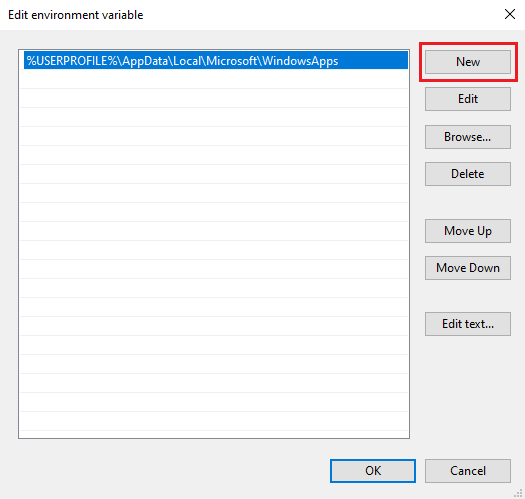
In the new Edit environment variable window that opens up, click on New to add a new entry.
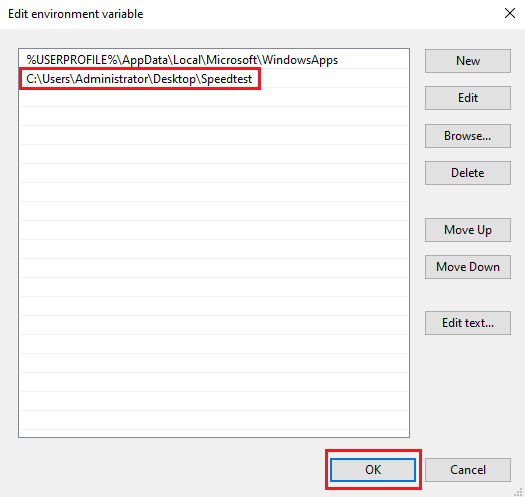
The new entry that needs to be added is the path of the speedtest.exe file, which has been placed in the folder named Speedtest in the Desktop of the server. Once the path is specified, click on OK to complete setting up the environment variable for Speedtest.
In the context of this guide, this path would be as follows:
C:\Users\Administrator\Desktop\Speedtest
Testing Speedtest CLI tool
Once after completing setting up the environment variable for Speedtest, the Speedtest CLI can be tested through the Windows command prompt.
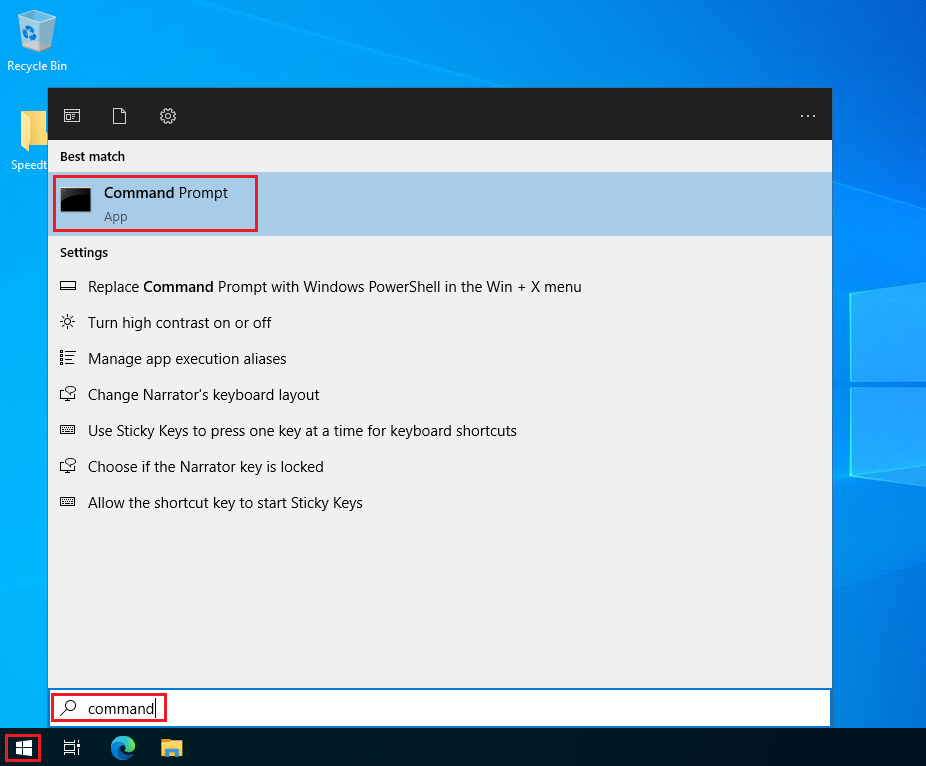
Click on Start, search for command and then click on Command Prompt.
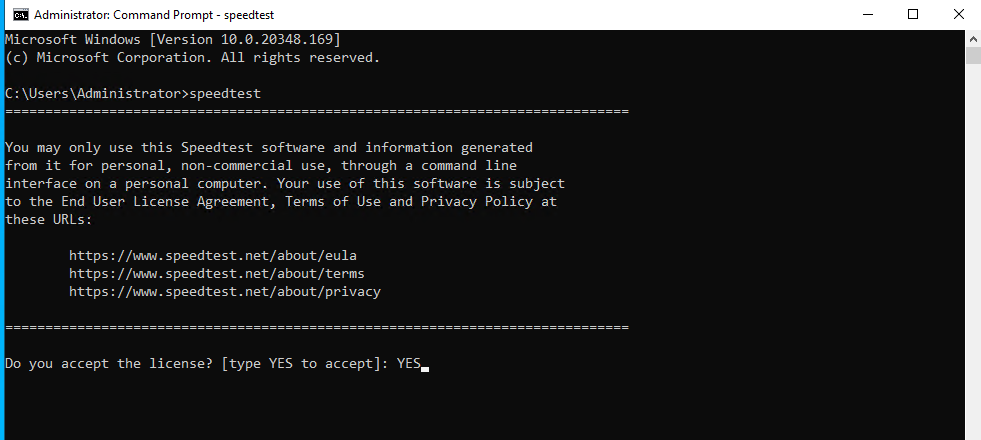
Type in speedtest in the command prompt.
A prompt to accept the license of the Speedtest software will be shown, type in YES and then press Enter.
Once the license is accepted, a speedtest will be automatically performed and the results of the speedtest will be displayed in the command prompt itself.
