How to Install Apache Tomcat on Ubuntu 24.04 Cloud Servers
Introduction
Apache Tomcat is an open-source web server application that provides developers with a secure and efficient platform for running Java applications. It implements the Java Servlet and JavaServer Pages (JSP) specifications, enabling the deployment and management of Java-based web applications on servers.
With features such as load balancing, clustering, and high availability, Apache Tomcat delivers reliable performance, making it well-suited for applications with varying workloads.
In this article, we will guide you through the process of installing Apache Tomcat on Ubuntu 24.04, enabling you to seamlessly run dynamic web applications on your LayerStack Cloud Servers.
Prerequisite:
Deploy an Ubuntu 24.04 Cloud Servers on LayerStack.
Access the server using SSH.
Update the server's packet index.
A. Installing Java OpenJDK
Apache Tomcat requires Java Development Kit (JDK) version 17 or later. To get started, follow the steps below to install the necessary OpenJDK version and set up a dedicated user to run Tomcat securely on your Cloud Servers.
Install
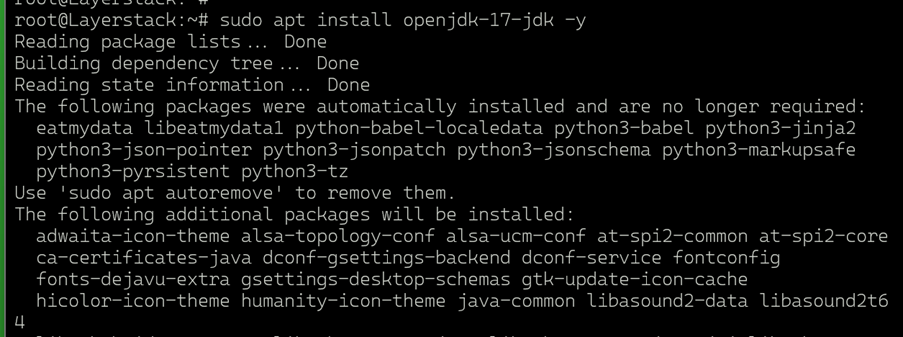
OpenJDK 17on your server.# sudo apt install openjdk-17-jdk -yThe command installs OpenJDK 17, a required Java development kit for running Apache Tomcat:
View the installed Java version.
# java -versionThe command verifies the installed Java version to ensure OpenJDK 17 is correctly installed:

Create a new Tomcat group to use with the Apache Tomcat service.
# sudo groupadd tomcatThe command creates a new user group named
tomcatfor managing permissions related to Tomcat:
Create a new Tomcat user with
/opt/tomcatas the home directory and a member of the Tomcat group.# sudo useradd -s /bin/false -g tomcat -d /opt/tomcat tomcat
The command creates a new system user named Tomcat with /opt/tomcat as the home directory and adds the user to the Tomcat group.
B. Installing Apache Tomcat and Configuration
Apache Tomcat is NOT included in the default Ubuntu package repositories. Follow the steps below to download the latest Apache Tomcat release and install it on your Cloud Servers.
Visit the Apache Tomcat releases page and download the latest Apache Tomcat 11 release file. Use the command below to download version 11.0.1 directly:
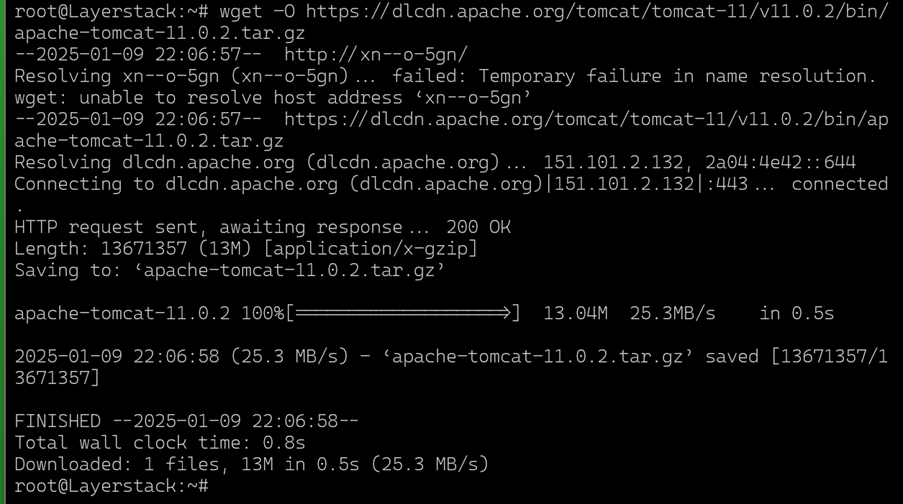
# wget –O https://dlcdn.apache.org/tomcat/tomcat-11/v11.0.2/bin/apache-tomcat-11.0.2.tar.gzThis command downloads the Tomcat 11.0.1 release file to your server. Ensure you download the latest version to take advantage of updated features and configurations. Official Tomcat URL: https://dlcdn.apache.org/tomcat/
Create a dedicated
Tomcat Directoryin a system-wide location(E.g. /opt)to extract the package contents.# sudo mkdir /opt/tomcat
Extract the contents of the downloaded archive to the
/opt/tomcatdirectory using the following command.# sudo tar -xvzf apache-tomcat-11.0.2.tar.gz -C /opt/tomcat --strip-components=1The command extracts the downloaded Tomcat archive into
/opt/tomcatand removes the top-level directory from the archive: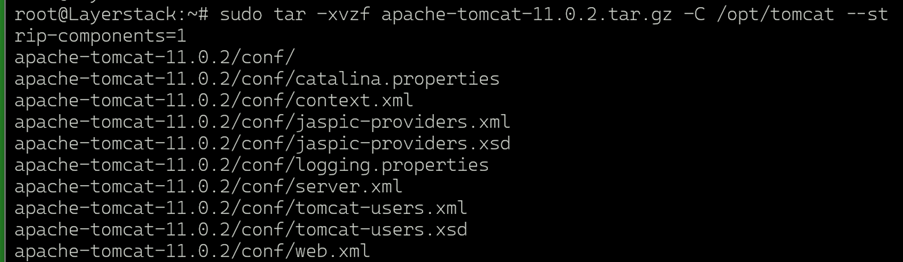
Assign ownership of the
/opt/tomcatdirectory to the Tomcat user and group.# sudo chown -R tomcat:tomcat /opt/tomcatThe command changes ownership of the
/opt/tomcatdirectory and its contents to the Tomcat user and group:
Grant the Tomcat group read permissions for the
confdirectory.# sudo chmod g+x /opt/tomcat/conf
With these steps completed, Apache Tomcat is now installed and ready for further configuration.
C. Creating Apache Tomcat Users
Apache Tomcat requires specific user accounts with administrative privileges to access the manager and host-manager applications in the web management dashboard. Follow the steps below to create privileged users and remove IP address restrictions, enabling access to these applications.
Open the
tomcat-users.xmlconfiguration file using a text editor for editing.# sudo vim /opt/tomcat/conf/tomcat-users.xml
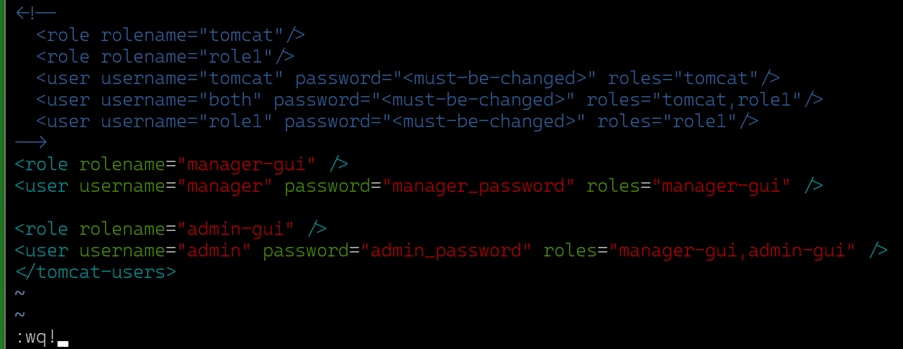
Add the following configurations above the
/tomcat-usersdirective. Replacemanager_passwordandadmin_passwordwith your desired passwords for themanagerandadminusers.<role rolename="manager-gui"> <user username="manager" password="manager_password" roles="manager-gui"> <role rolename="admin-gui"> <user username="admin" password="admin_password" roles="manager-gui,admin-gui">This configuration creates
two users:
A manager user with manager privileges for the Tomcat web management dashboard.
An admin user with both manager and administrator privileges.
Remove Manager Application Restrictions by opening the
context.xmlfile for themanagerapplication.# sudo vim /opt/tomcat/webapps/manager/META-INF/context.xml
Locate and disable the following
Valve Directiveby wrapping it in a<!-- Valve directive -->comment:<!-- <Valve className="org.apache.catalina.valves.RemoteAddrValve" allow="127\.\d+\.\d+\.\d+|::1|0:0:0:0:0:0:0:1" ></Valve> -->Before:
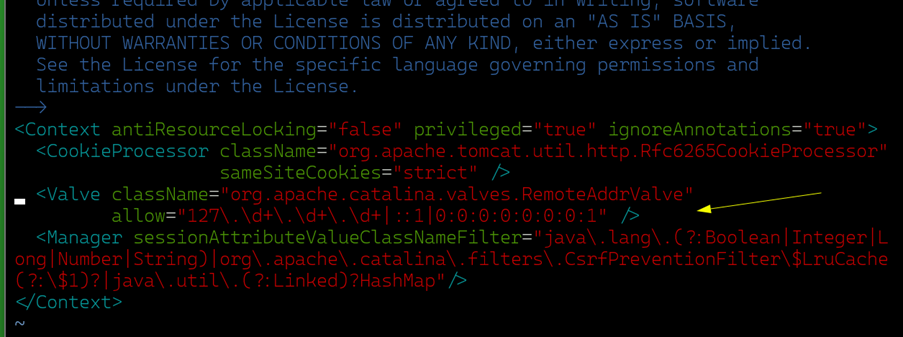
After:
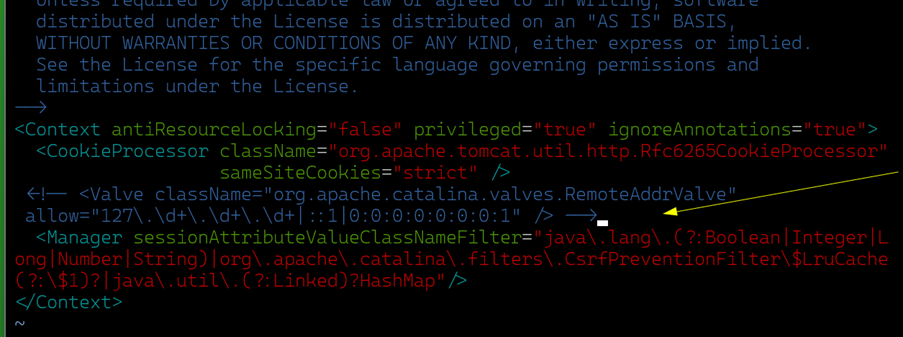
=> Save and close the file, this change removes the IP address restrictions, allowing access to the
managerapplication.Remove Host Manager Application Restrictions by opening the
context.xmlfile for thehost-managerapplication.# sudo vim /opt/tomcat/webapps/host-manager/META-INF/context.xml
Similarly, locate and disable the following
Valve Directiveby wrapping it in a<!-- Valve directive -->comment:<!-- <Valve className="org.apache.catalina.valves.RemoteAddrValve" allow="127\.\d+\.\d+\.\d+|::1|0:0:0:0:0:0:0:1" ></Valve> -->Before:

After:
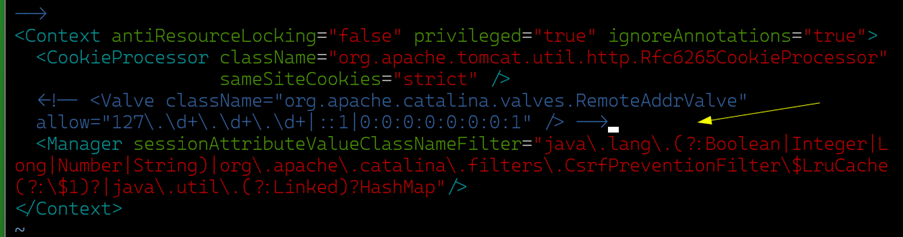
=> Save and close the file, this change removes the IP address restrictions, enabling access to the
host-managerapplication.
By completing these steps, you will have configured the necessary users with the appropriate privileges and removed access restrictions, making the manager and host-manager applications accessible on your server.
D. Setting Up Apache Tomcat as a System Service
Follow these steps to create a system service that run and manage Apache Tomcat processes on your Cloud Servers.
Display the Java installation path.
# sudo update-java-alternatives -l
Create a new
tomcat.servicesystem service file by opening the system service file in a text editor.# sudo vim /etc/systemd/system/tomcat.service
Add these settings into the file and ensure you modify the
JAVA_HOMEvalue to match your Java installation path if it differs from the example provided:[Unit] Description=Tomcat After=network.target [Service] Type=forking User=tomcat Group=tomcat Environment="JAVA_HOME=/usr/lib/jvm/java-1.17.0-openjdk-amd64" Environment="JAVA_OPTS=-Djava.security.egd=file:///dev/urandom" Environment="CATALINA_BASE=/opt/tomcat" Environment="CATALINA_HOME=/opt/tomcat" Environment="CATALINA_PID=/opt/tomcat/temp/tomcat.pid" Environment="CATALINA_OPTS=-Xms512M -Xmx1024M -server -XX:+UseParallelGC" ExecStart=/opt/tomcat/bin/startup.sh ExecStop=/opt/tomcat/bin/shutdown.sh RestartSec=10 Restart=always [Install] WantedBy=multi-user.target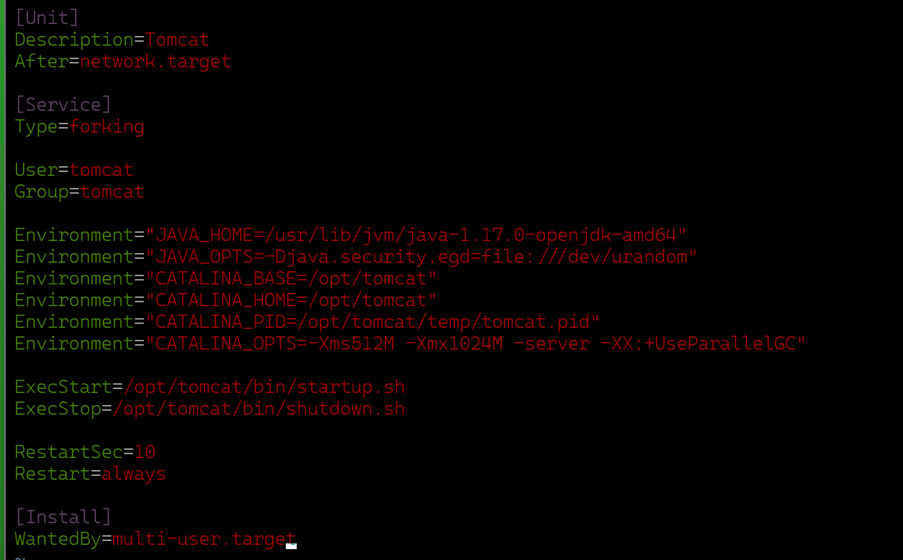
=> Save and close the file.
The above configuration sets up a new Tomcat service that will start and stop the application using the startup.sh and shutdown.sh scripts located in the Apache Tomcat directory.
Reload the
systemd daemonto apply the new service configuration.# sudo systemctl daemon-reload
This command reloads the
systemd managerconfiguration.Enable the Apache Tomcat service to start at boot.
# sudo systemctl enable --now tomcat
The command
sudo systemctl enable --now tomcatstarts the Tomcat service immediately and enables it to start automatically at system boot.Verify Tomcat running status.
# sudo systemctl status tomcat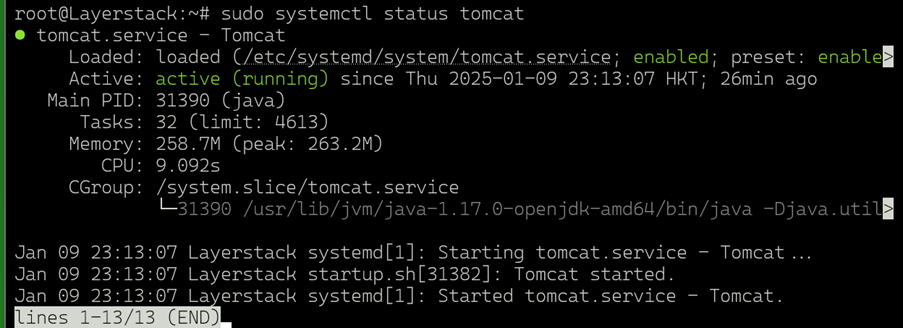
E. Accessing the Apache Tomcat Web Management Dashboard
Follow these steps to access the Apache Tomcat web management dashboard, where you can view and manage web applications on your Cloud Servers.
Open any web browsers (E.g. Chrome) and visit your Apache Tomcat domain on
port 8080.http://<ipaddress>:8080 http://<domain>:8080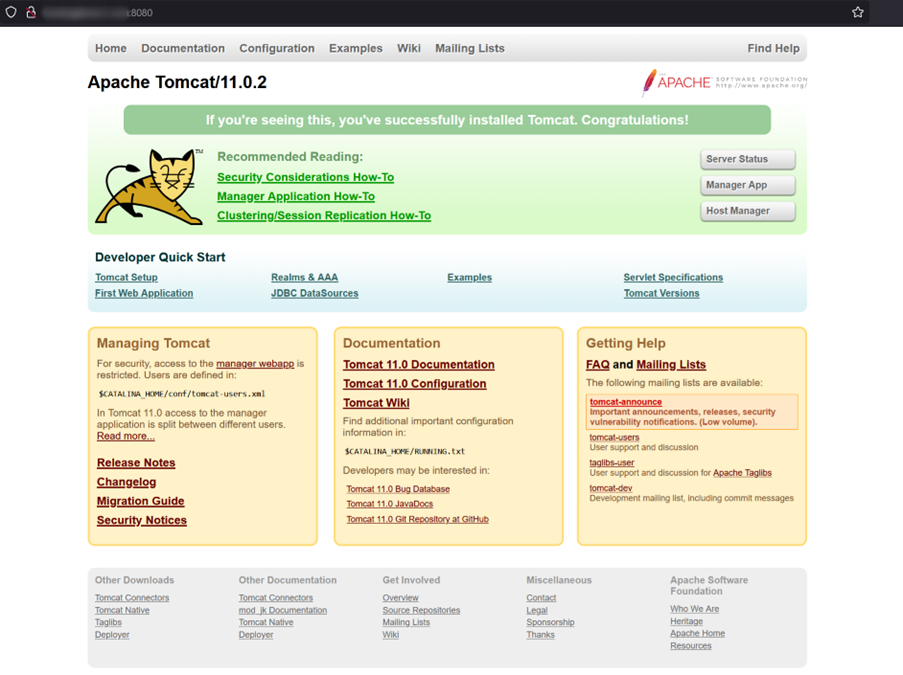
To access the Apache Tomcat manager application, click on
Manager App. When prompted, enter your manager username and password to sign in.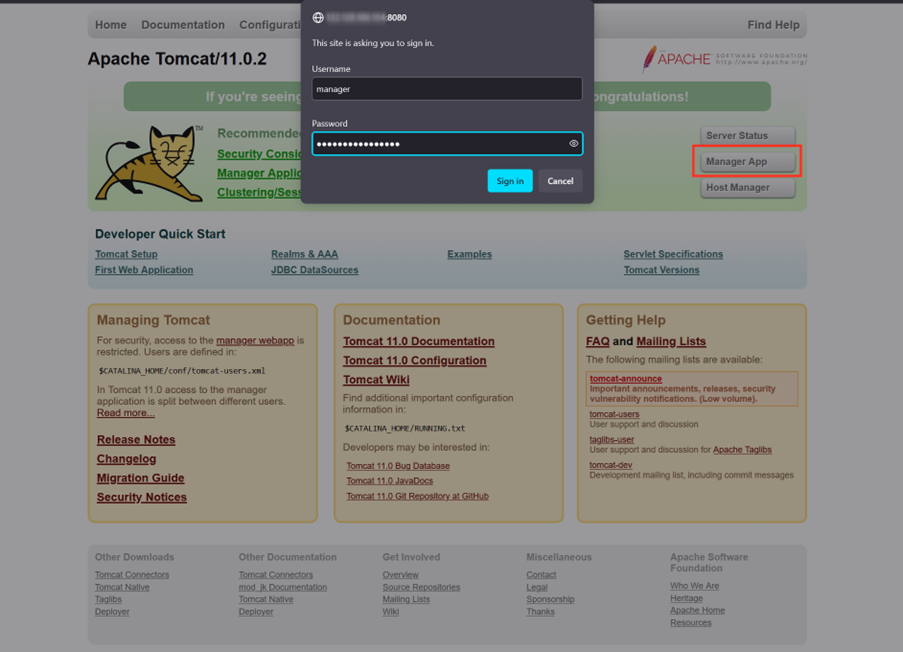
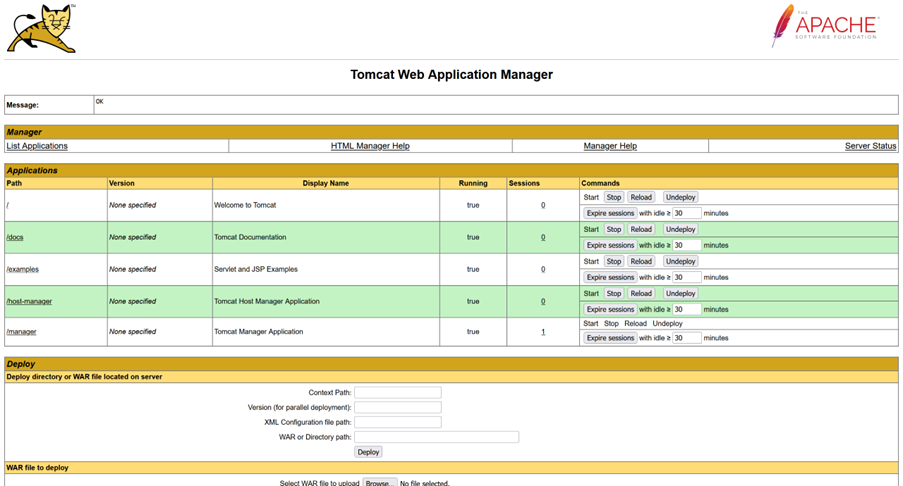
You should now be able to manage your Tomcat web applications and server settings. By following this guide, you will have successfully installed and configured Apache Tomcat on your Ubuntu 24.04 server, ensuring a smooth setup for running Java-based web applications.
Related Tutorials
