Ubuntu is a modern, open-source Linux distribution available in multiple versions. Ubuntu 24.04 is a Long-Term Support (LTS) release that offers the latest packages, an updated kernel, enhanced application stability, and improved security features compared to Ubuntu 22.04. Upgrading from Ubuntu 22.04 to 24.04 allows you to benefit from these enhancements.
This article provides a step-by-step guide on how to upgrade from Ubuntu 22.04 to 24.04.
Prerequisites
Before we begin, ensure the following:
Ubuntu 22.04 Server installed (without a desktop environment).
A user account with sudo privileges or root privileges.
Internet access to download and install packages.
A remote desktop client (Windows: mstsc, macOS: Microsoft Remote Desktop, Linux: Remmina).
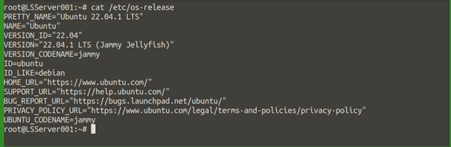
The current Ubuntu version of Cloud Servers can be checked by the following command.
# cat /etc/os-release
NOTE: Before proceeding with the upgrade, please make sure to back up all the important data to your local drive.
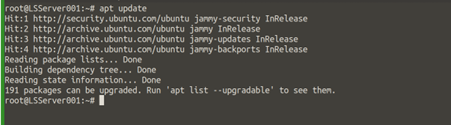
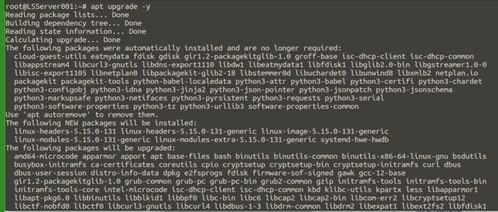
Update and upgrade the entire system to the latest Ubuntu release.
# apt update

# apt upgrade -y

# reboot -f
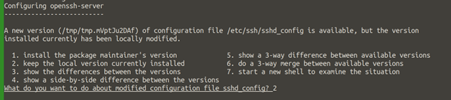
While installation, there will be a prompt to select the following options, select keep the local version currently installed:

NOTE: Keeping your system up to date ensures you have the latest security patches and features, which is crucial for a stable and secure environment.
Initiate the upgrade process.
# do-release-upgrade -d
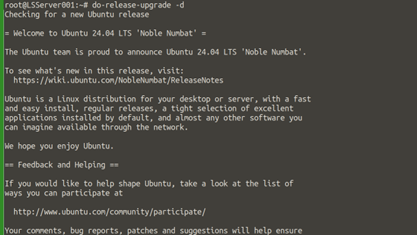
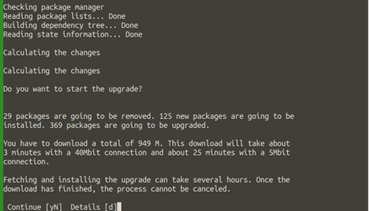
The update tool will calculate all the changes and provide a summary.
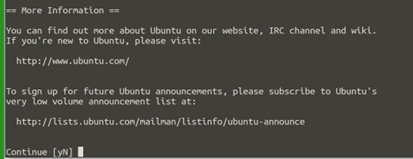
To continue, once again, press y and press ENTER:
NOTE: During these steps you may encounter this error where the further operations being aborted due to lack of space in the /boot partition. In such case you would require to check and remove any unused kernel image in the memory so that /boot will have space. For that you may please check with the commands.
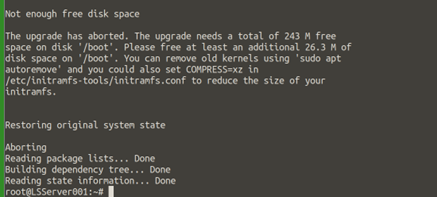
# dpkg -l | grep linux-image
# uname -r
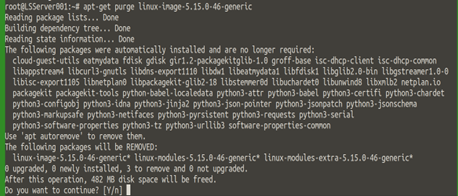
# apt-get purge linux-image-version-generic
NOTE: Please replace 'version' with the actual version number, such as 5.15.0-46.


Execute the do release upgrade command once again.
# do-release-upgrade -d
It will prompt for continue, press y and ENTER when necessary:
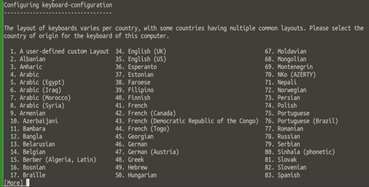
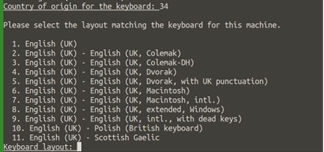
Further, this will prompt for the Keyboard, and Layout, please give the choice of keyboard. In this tutorial, selected English (US).
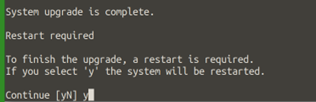
Once everything runs, it will ask for the restart. Give the option y to continue.
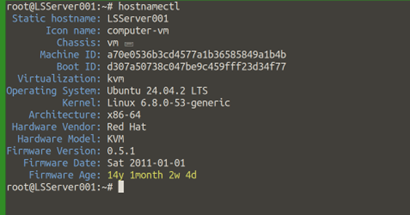
Once booted up, the OS has upgraded and you would be able to find the same by the below command.
# hostnamectl
Related Tutorials
