Enabling Ping will make network troubleshooting easier which allows all inbound ICMP traffics and this also includes the echo requests by using this common command.
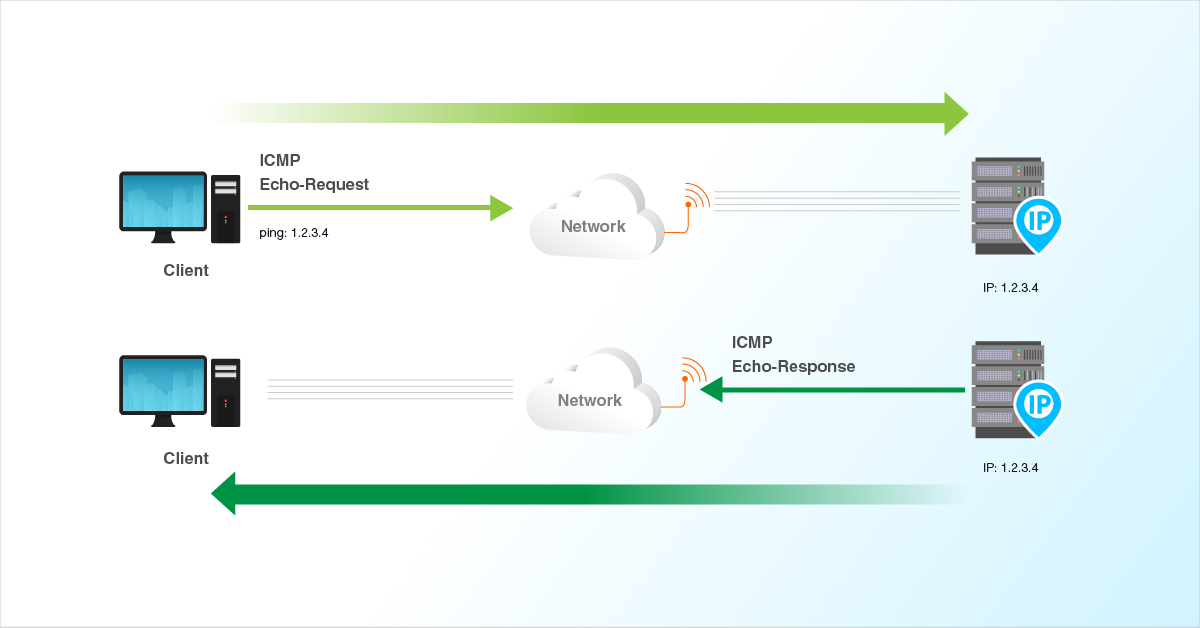
Requests will expire as shown in the image below before Ping is enabled.

This guide outlines the basic steps to enable and disable Ping from the Windows firewall on the Windows server.
Step A - Opening Windows firewall
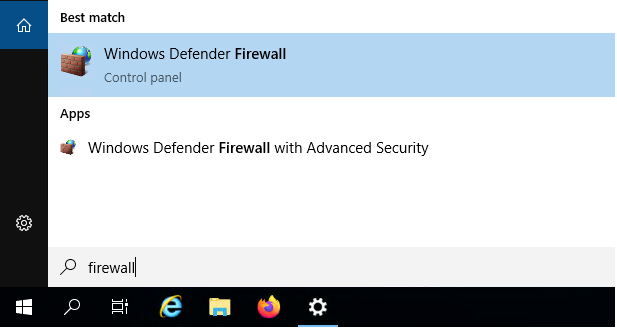
To open the Windows firewall, just click on the Windows key to open start and search firewall, and then click on the Windows Defender Firewall with Advanced Security which is shown in the below image.
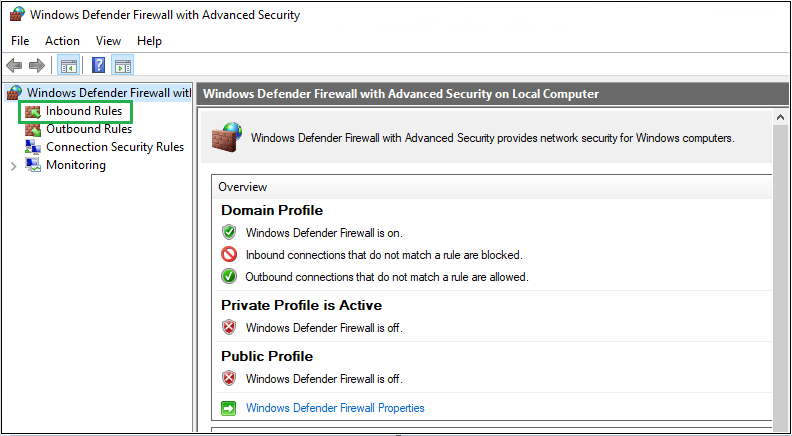
From the menu on the left, select the Inbound Rules specified in the image below.
Step B - Enabling OR Disabling the rule
To Enable for IPv4
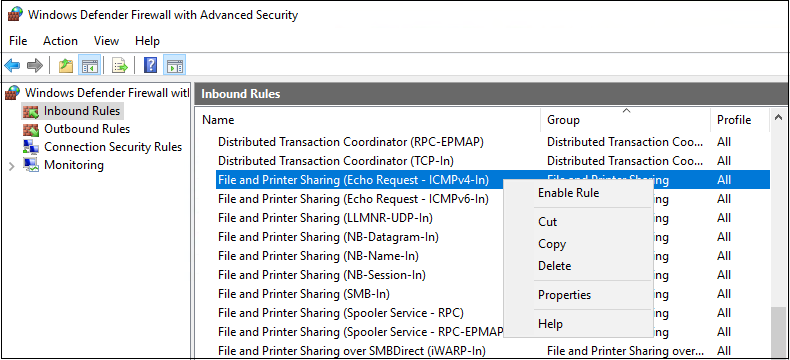
Select File and Printer Sharing (Echo Request – ICMPv4-In) from the rules listed under Inbound Rules and enable the rule as shown in the below image.
To Enable for IPv6
Select File and Printer Sharing (Echo Request – ICMPv6-In) from the rules listed under Inbound Rules and enable the rule as shown in the below image.
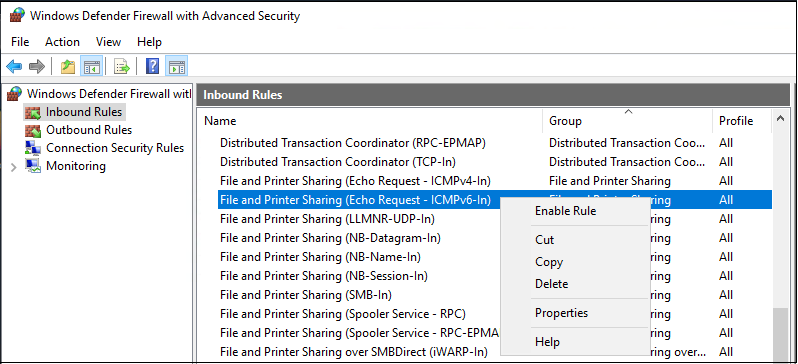
Once the ping is enabled, the server should now respond to ping requests for both IPv4 and IPv6. That is shown in the below image.

To Disable for IPv4
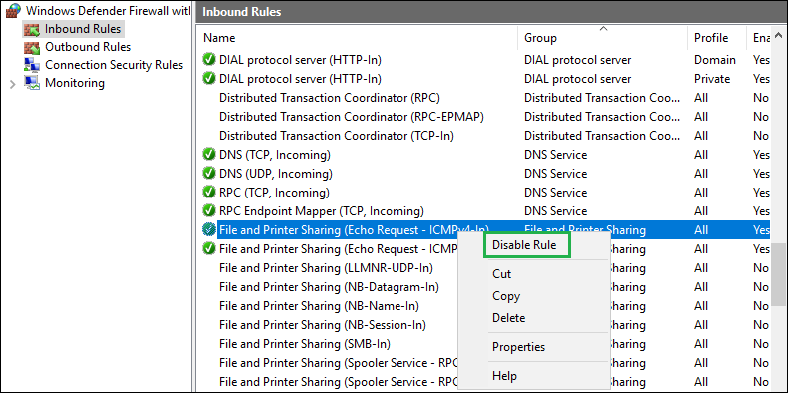
Select File and Printer Sharing (Echo Request – ICMPv4-In) from the rules listed under Inbound Rules and disable the rule as shown in the below image.
To Disable for IPv6
Select File and Printer Sharing (Echo Request – ICMPv6-In) from the rules listed under Inbound Rules and disable the rule as shown in the below image.
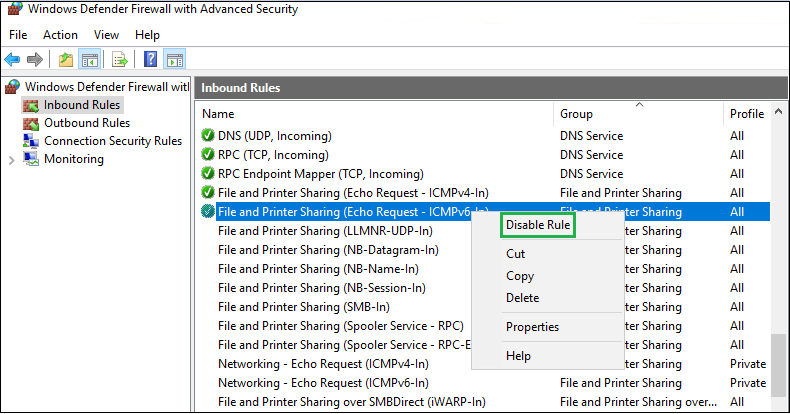
Once the ping is disabled, the server should now respond to ping requests for both IPv4 and IPv6. That is shown in the below image.

Related Tutorials
Other Information